.svg)
07_01_01_Explanation of the VR Hardware
1. Included Items
Meta Quest 3 Headset
2 Controllers (per Headset)
External Battery for the Meta Quest 3
Charging Station (includes cable and power adapter)
2. Basic Functions of the VR-Headset
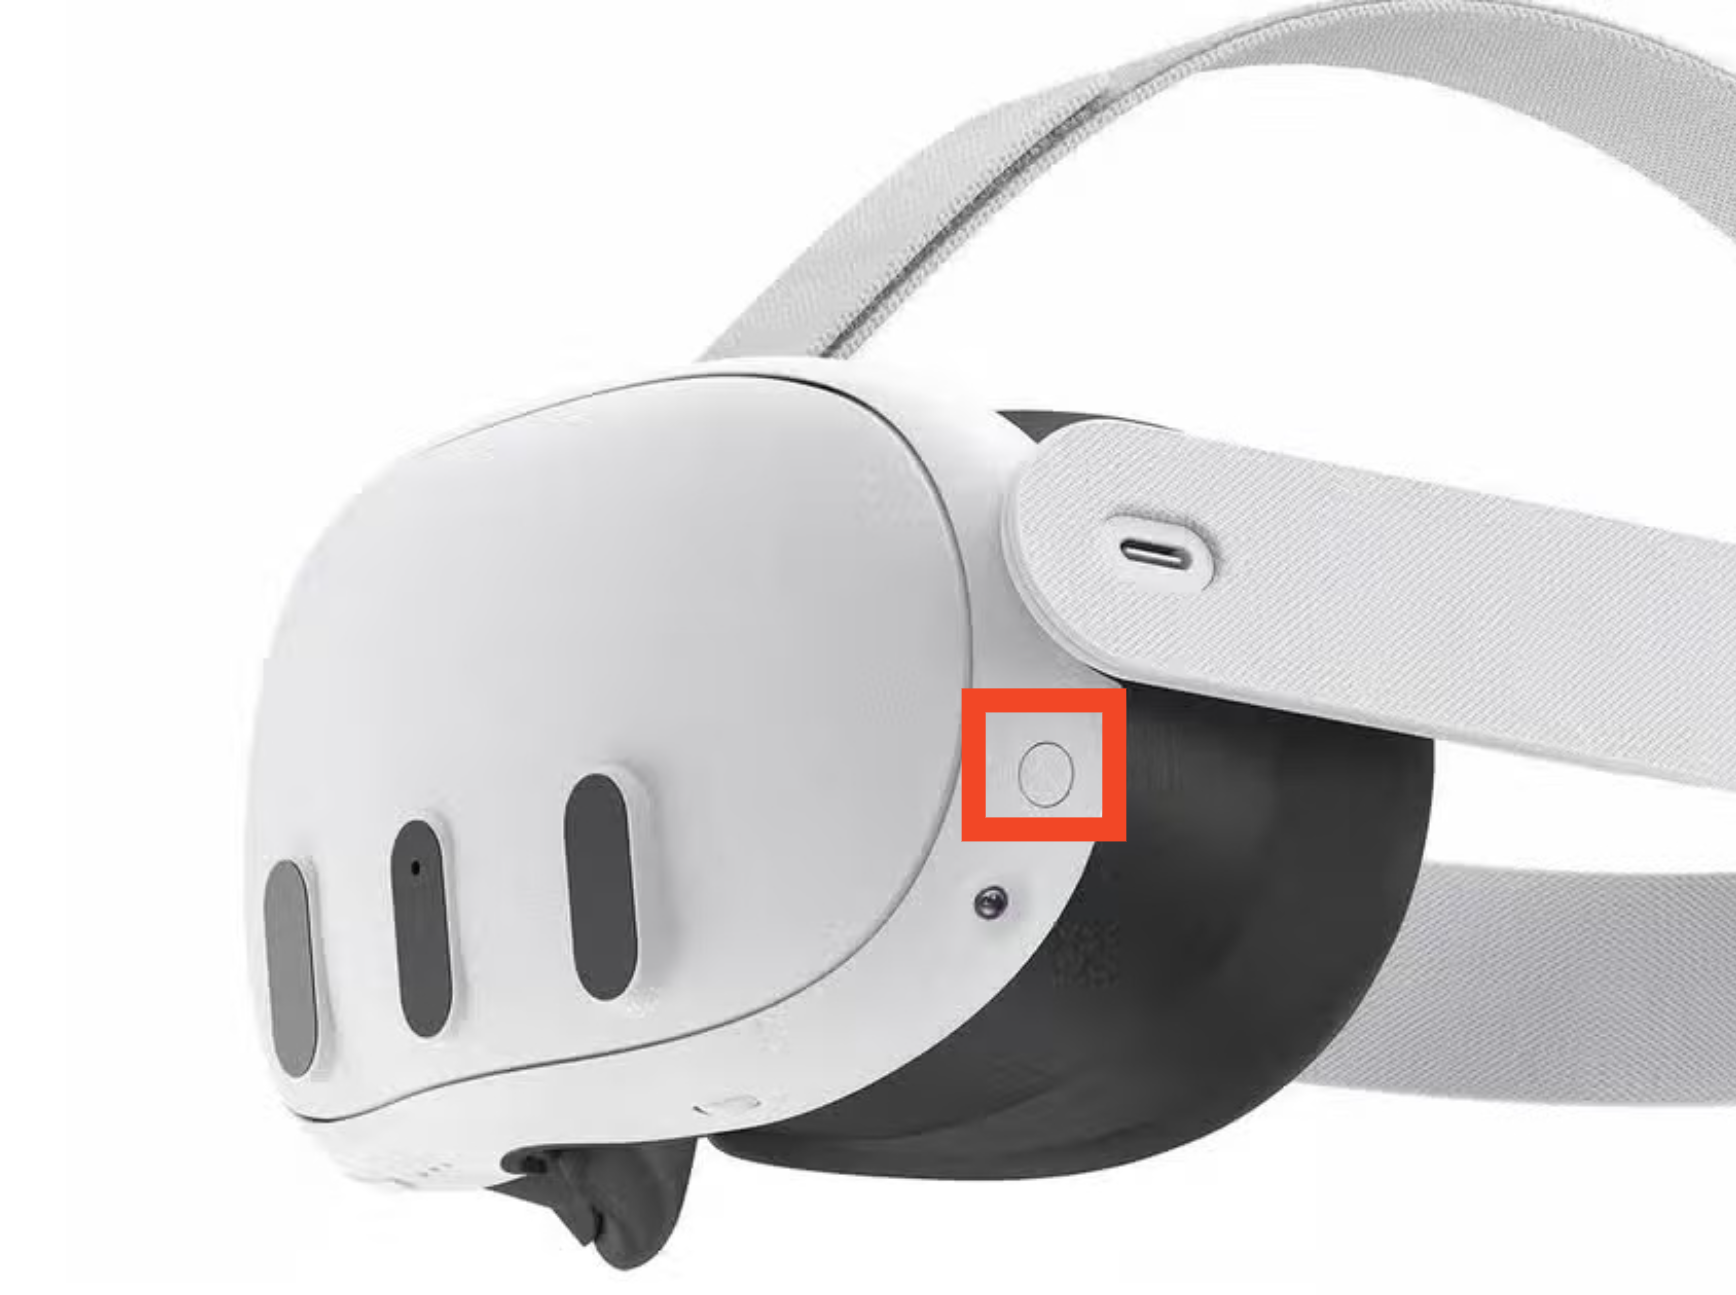
2.1 Power On:
Press and hold the button on the left side until the Meta logo appears on the displays.
2.2 Power Off:
Press and hold the left-side button for at least three seconds. A menu will appear on the displays, allowing you to power off the headset.
If no controllers are available, the volume buttons can be used as an alternative method for navigating and making selections.
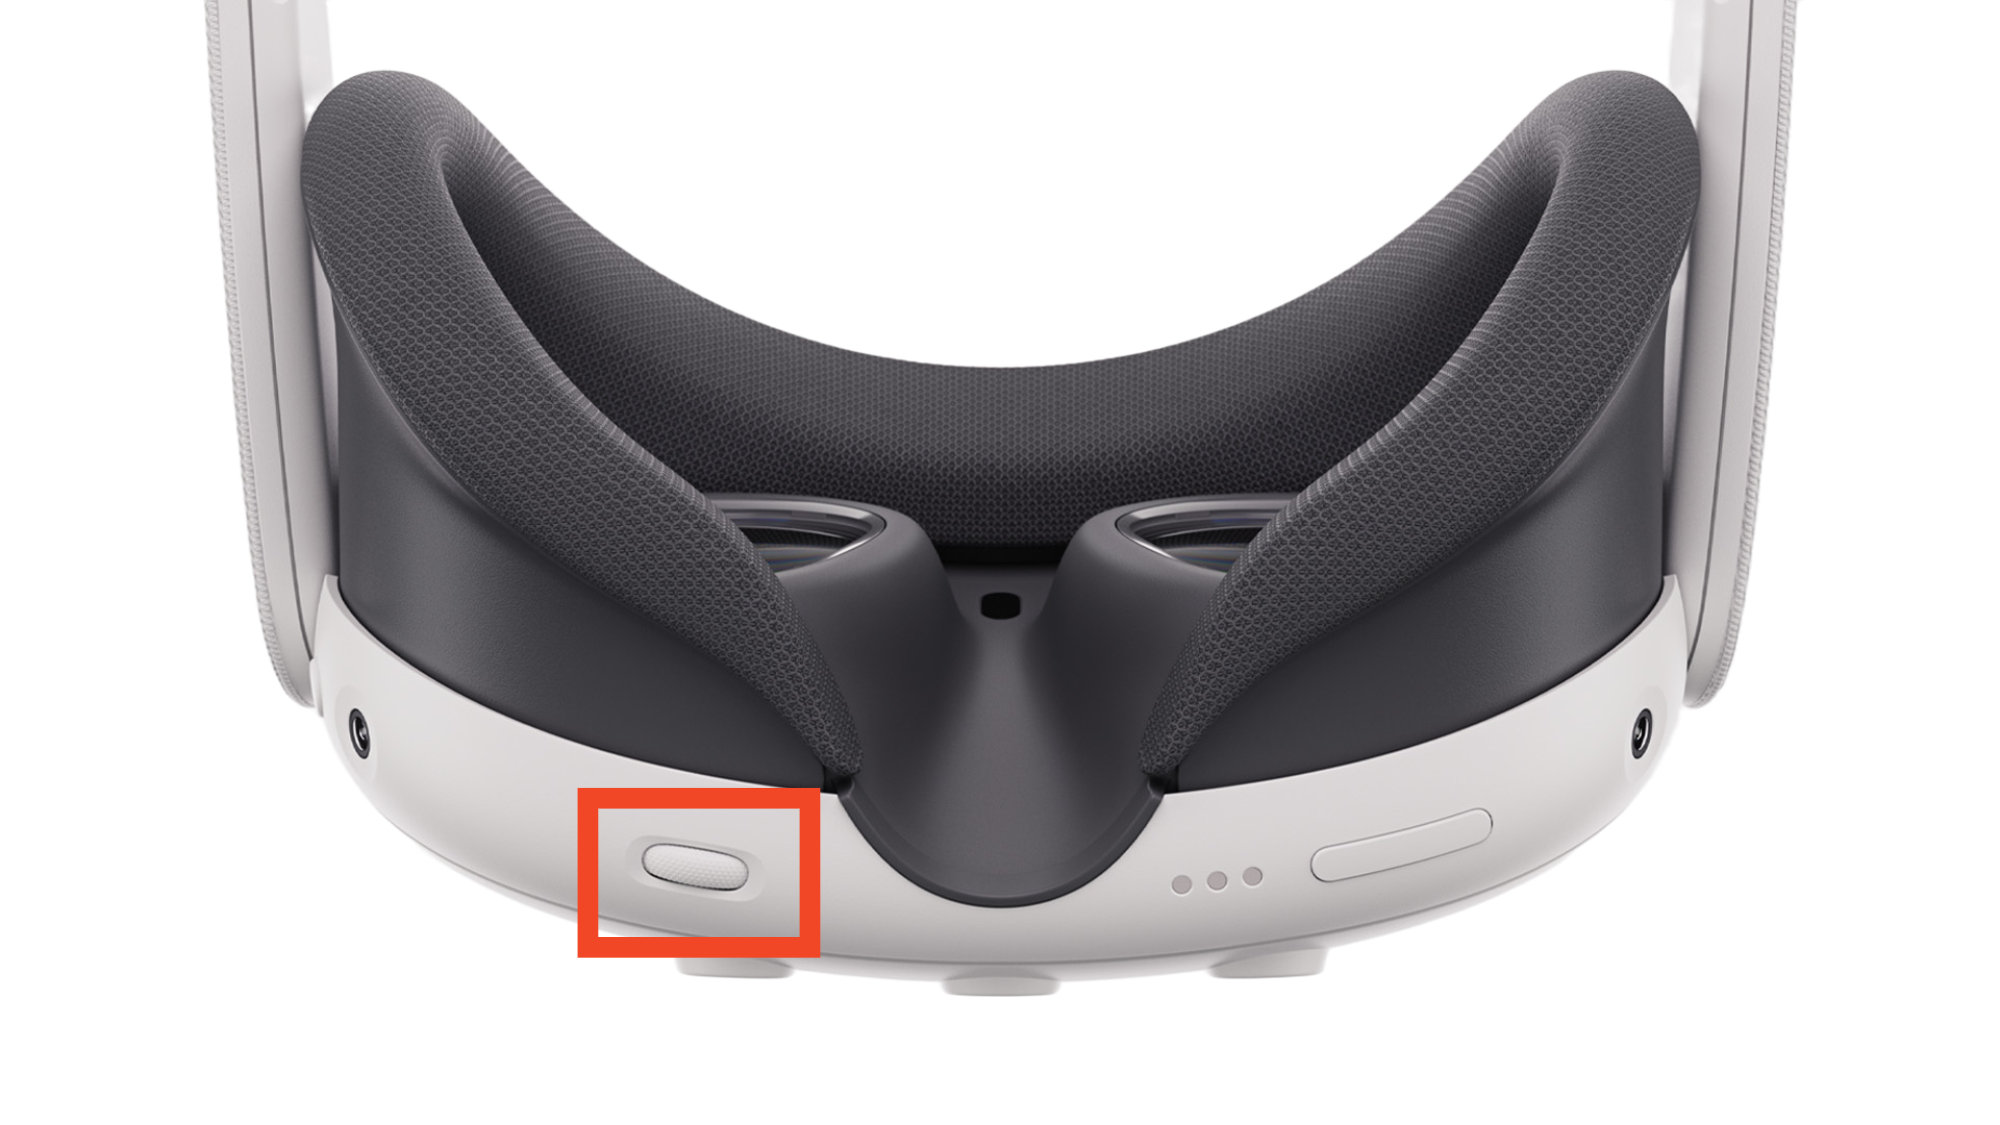
2.3 Volume Control:
Adjust the volume using the rocker located at the bottom of the headset.

2.4 Interpupillary Distance (IPD):
Adjust the distance between the lenses to suit your individual eye spacing by turning the regulator at the bottom of the headset. A graphic will appear on the displays to help guide the adjustment, ensuring a clear and comfortable view.
Note: For exhibitions or events with high visitor frequency, this adjustment step can be skipped.
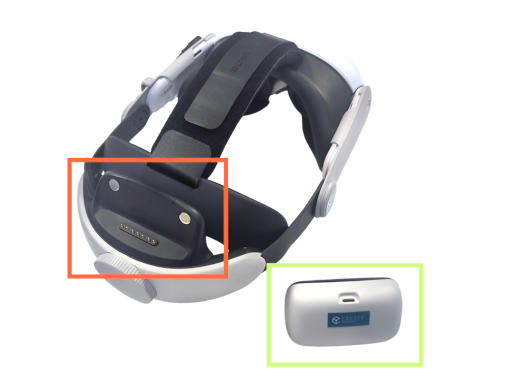
2.5 External Battery:
For extended battery life, the headset can be equipped with an external battery (highlighted in green). This battery attaches magnetically to the back of the head strap (marked in red).
Note: The external battery is charged separately from the headset (refer to the 07_01_03_Charging and Storage of the VR Hardware section).
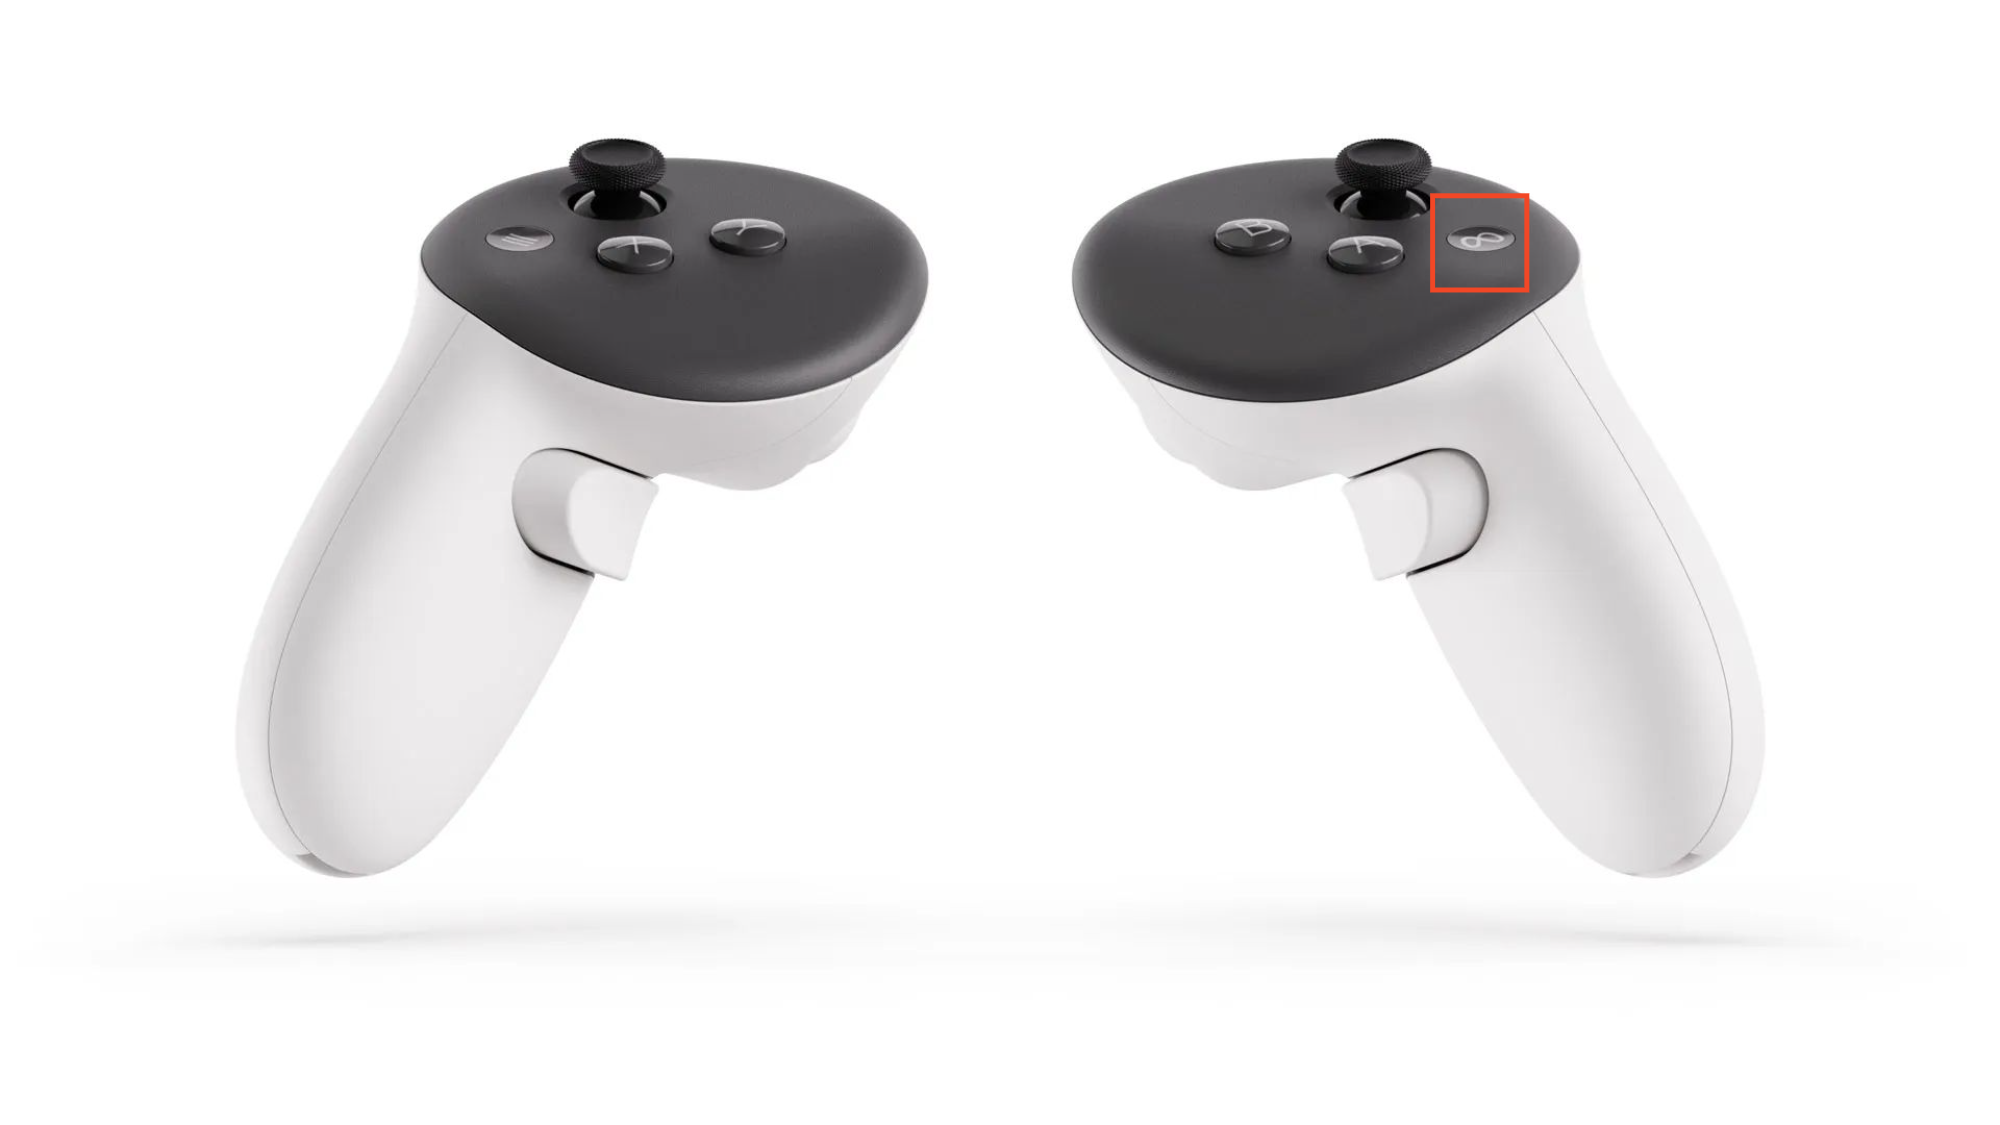
3. Basic Functions of the Controllers
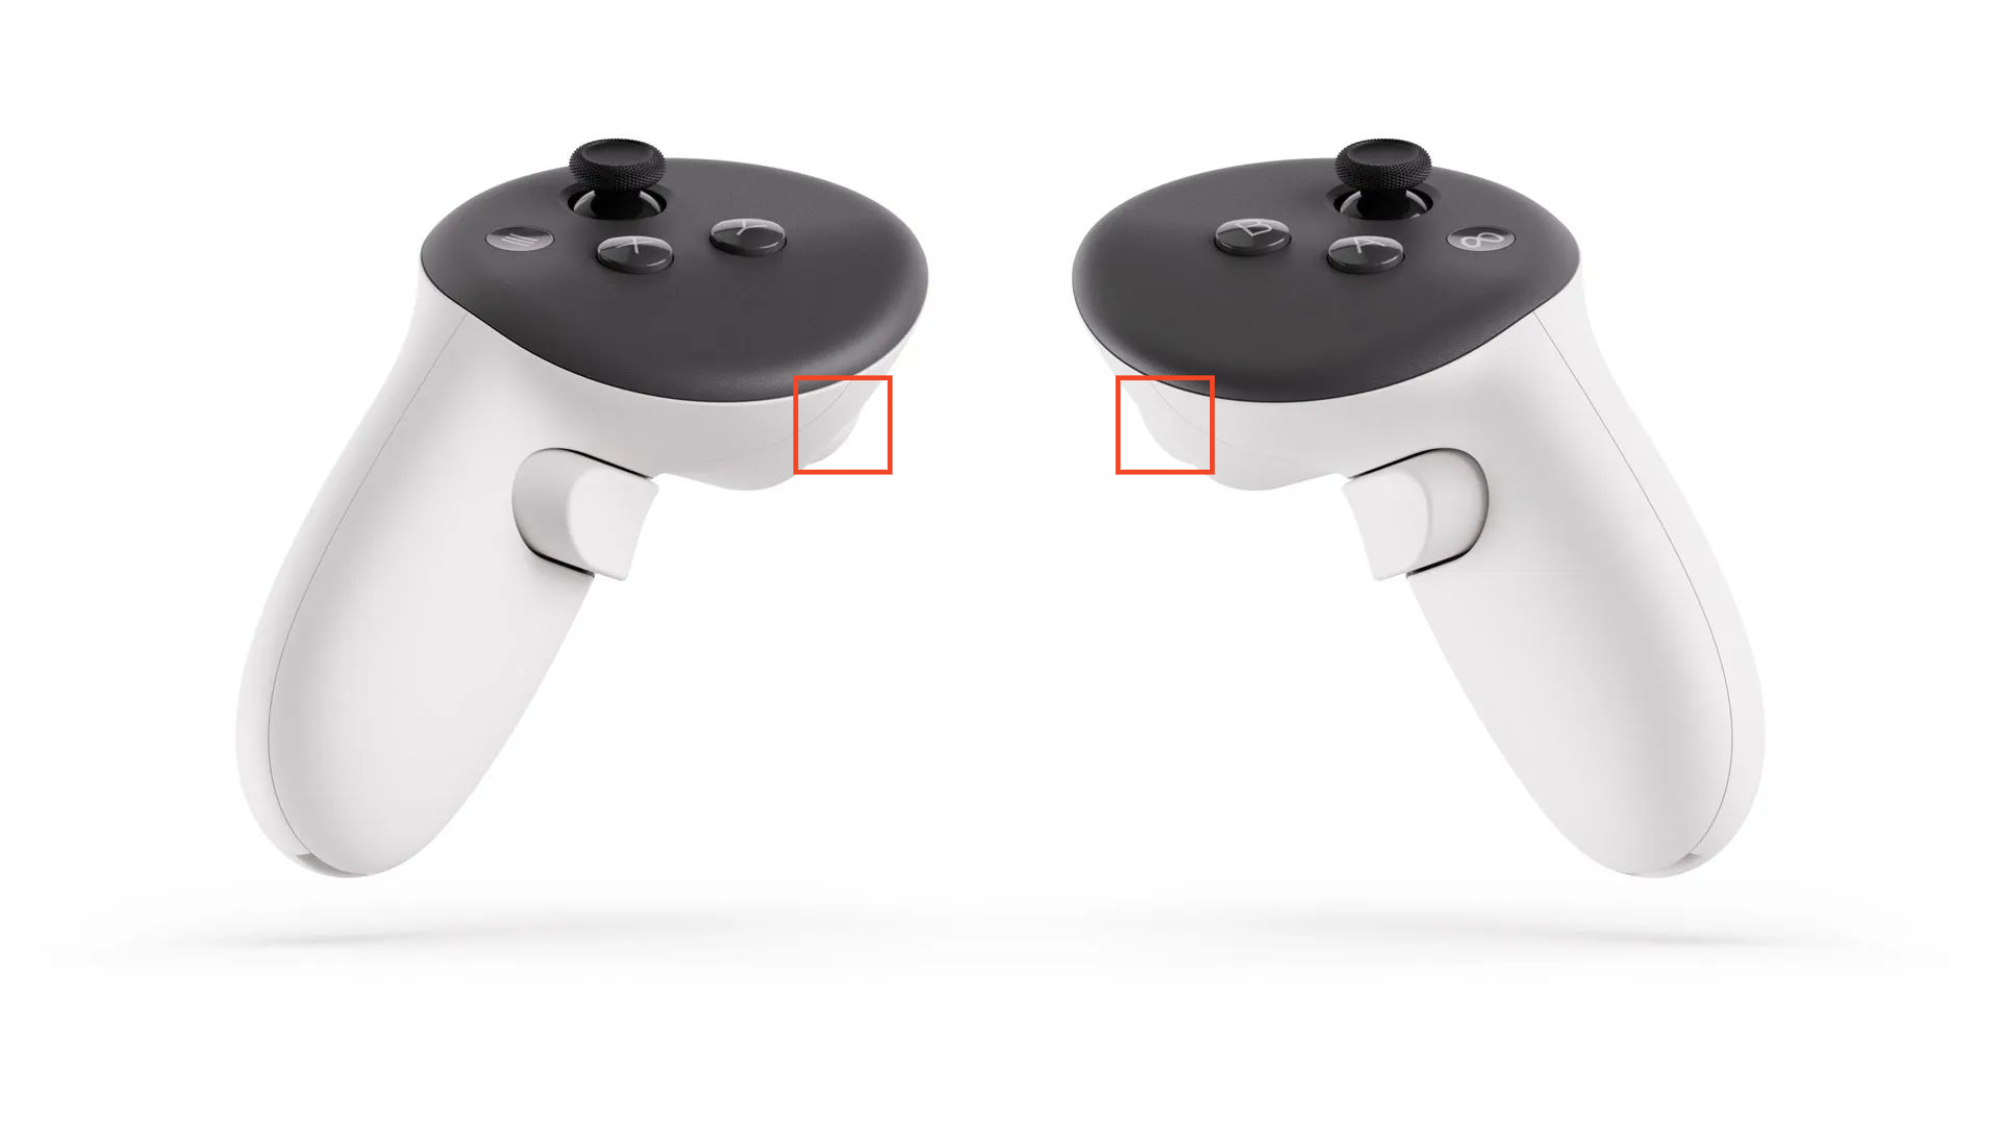
3.1 Trigger (front of the controller):
Used for selecting objects and menu items.
3.2 Meta Button:
(only on the right controller, recessed button)Press to open the main menu.
Press and hold to center the headset view.
4. Wearing the Headset
4.1 Positioning:
Lift the head strap so that you can comfortably place the headset on your face.
4.2 Alignment:
Align the headset so that the lenses are directly in front of your eyes.
4.3 Securing:
Pull the head strap back down to secure the headset. Adjust the width using the adjustment wheel at the back of the headset.
4.4 Final Adjustments:
The fit at the back of the head can be further adjusted via the Velcro on the headband at the top of the headset.
Note for Glasses:
If you wear glasses and they do not fit comfortably under the VR headset, please remove them.
To facilitate wearing glasses, a spacer is provided. To adjust the spacer, press both buttons on the inside of the headset simultaneously and hold them down. Then, set the spacer to one of the four available positions to achieve the optimal distance between your eyes and the lenses.
07_01_01_Explanation of the VR Hardware
07_01_02_Headset Startup & Initial Setup
07_01_03_Charging and Storage of the VR Hardware
07_02_Operating the DEKRA Technology Center